Feel free to email any news, videos, recipes, or just about anything to mysweetdiversion(at)hotmail(dot)com!

Sunday, January 29, 2012

Totally Rad 80's Birthday Cake!

This past weekend, I made a half sheet cake for an 80s-themed birthday party. I had a lot of creative license, but I didn't want to do the typical Pac-Man, cassette tape, and Rubik's Cube (although all of those things were cool). I wanted to use the 80s-style patterns and super-bright color scheme. Pretty-much, the louder and tackier, the better. Luckily, while I was buying a half sheet pan at the craft store, I found these:
Perfect!
I baked off my half sheet cake and let it cool. Then I mixed up 3 batches of almond buttercream (which is about 10 cups). I iced the cake in white, then iced a layer of pink on the sides. Checkerboard was a dominant pattern in most of the 80s things I saw, so I added some checkerboard patterns to opposite corners, then some triangle shapes coming out of the other corners. And to the pink sides, I added zebra stripes (I was going for the highest tack-factor here). I finished the cake off with some white chocolate numbers and bright-colored flowers, and everything actually came together in a funky sort of way.
I think my retro font added to the funkiness as well.
My client, the birthday girl, loved it when she picked it up, so I hope the party-goers loved it too!

**Update: They did! There was only one slice left!

Sidenote: Today marks my 3001st page-view! (I could say 3000th but I wasn't sure if that was today or yesterday). Slowly, but surely creeping up to a million! Thank you, everyone!

Sunday, January 22, 2012

Pumpkin Cream Cheese Pie with Pecan Streusel Topping

Good evening, readers! I know you're thinking "Pumpkin!?!? In January!?" Well, as you may already know,  I love love love pumpkin, so I'm always ready to jump at any opportunity to bake and eat it! So this time, I contributed to a pot luck with this delicious dessert. The friend who was throwing the pot luck suggested I make the pie since she and her fiance could not get enough of it when I made it for Thanksgiving a couple of years ago.

I originally got the recipe from a fellow Virginia Beach blogger at How to Eat a Cupcake. It was adapted from a Better Homes and Gardens cookbook. She used a homemade pie crust in her recipe but I cheated with 2 regular 9" frozen pie crusts, which works just as well. I made 2 pies this way, or you could use one deep dish crust and make one thick pie. But I liked the fact that I could keep one and leave the other at the pot luck.

  • 1 8-oz package cream cheese, softened
  • 1/4 c sugar
  • 1/2 tsp vanilla
  • 1 slightly beaten egg
  • 1/4 c canned pumpkin
  • 1 c evaporated milk
  • 2 beaten eggs
  • 1/4 c sugar
  • 1/4 c packed brown sugar (I used dark brown)
  • 1 tsp ground cinnamon
  • 1/4 tsp salt
  • 1/4 tsp ground nutmeg
  • 1/2 c chopped pecans 
  • 2 Tbsp all purpose flour
  • 2 Tbsp brown sugar
  • 1 Tbsp butter, softened
*Note: I doubled the streusel  topping recipe because I made 2 pies.*

1) In a mixer, beat the first four ingredients on low to medium speed until smooth.
2) I chilled the mixture in the refrigerator fro 30 minutes. (I put mine in a separate bowl so I could reuse my mixer bowl).
 3) Preheat the oven to 350. Pour the mixture into the bottom of the pie shell(s)
4) Mix the next 6 ingredients until smooth in a mixer.
5) Carefully pour the pumpkin mixture over the cream cheese.
6) Cover the edges of the pie crusts with foil to prevent over-browning (aka burning) then bake for 25 minutes.

7) Remove the foil and bake the pies for another 25 minutes. Meanwhile, I chopped up my pecans and mixed the final 4 ingredients to make the pecan streusel topping.
8) Sprinkle the topping onto the pie(s) and bake for another 10 -15 minutes or until a knife inserted near the center of the pies comes out clean.

And the hard part is having to wait 1 to 2 hours for the pies to cool on a wire rack. But then you get to have this!
Yummy! The perfect complement for this pie would be either fresh-whipped cream or vanilla ice cream. I think I'll have a slice right now...

Sunday, January 15, 2012

Baby Mickey Smash Cake

Greetings, all! I must say that this latest cake was a bit of a challenge for me. For as long as I could remember, Mickey Mouse (and pretty much all of the Disney characters) has been quite difficult to draw.

Yes, as my other outlet of creativity, I enjoy creating 2-dimensional art (I think I still have an active DeviantART account [remember that?]). I usually draw portraits but I occasionally like trying to recreate cartoons. Disney characters usually escape me, however...

Anyhoo, I graciously accepted this smash cake order, and I was definitely determined!

For those who may not know, a smash cake is usually a small cake made specially for a baby or child so he or she can smash, eat, smear, throw, and/or dig into it at the party. So I started with baking up a single 6" layer of yellow cake and filling it with vanilla buttercream.
Then I iced the cake completely and set it in the refrigerator while I mixed my colors and prepared my bags. 
I started scoring the design with my fondant tool...
Then I filled in the lines and smoothed the icing over with a warm spatula.
I like how it came out. It's not an exact replica of Baby Mickey, but I think it still captures his cuteness and his... Mickey-ness. My client loved it, and I hope her little one-year-old enjoyed his first taste of cake! :)

Sunday, January 8, 2012

Stablized Whipped Icing

Hello, all! I just delivered an anniversary cake to a client that was iced in whipped icing! But it's OK, because it was stabilized! I had a horrific experience a few months ago with a wedding cake that was supposed to be iced in whipped cream. I tried to stabilize it with gelatin, but the warmth of the gelatin didn't quite work with keeping the whipping cream cold. It was a clumpy mess that didn't work at all.

So when a client asked me to make a cake with whipped icing, I was a bit wary. But I decided to take the challenge and try again! I found a Wilton recipe that looked promising, so I went for that! The recipe is as follows:
  • 1/2 pint (1cup) heavy whipping cream
  • 2 Tbsp powdered sugar
  • 2 Tbsp piping gel (I used teh Wilton brand found at my local craft store)
  • 1/2 tsp clear vanilla extract (also Wilton brand)
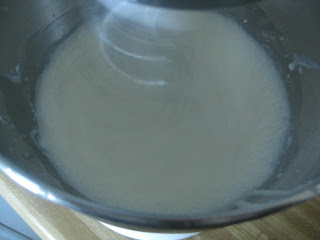
1) Combine the whipping cream and sugar in a mixing bowl (I chilled my bowl and whisk attachment for at least 20 minutes in the freezer beforehand).
2) Whip to soft peaks.
3) Add piping gel and vanilla.
 4) Then whip to stiff peaks, making sure not to overbeat.
This icing was a lot more easy to work with than before and it tasted amazing! It tasted like very light, fluffy vanilla ice cream. Yum! I had an 8" mocha cake to cover, so I filled the cake with espresso-infused whipped icing (yum!)

No worries! I fixed the uneven-ness!
The filled cake went into the freezer for half an hour, while I whipped up some more icing. For the 8" cake, I made four batches of the recipe (which is one quart of whipping cream exactly). I iced the cake then popped it back into the freezer for an hour.
I added a little ribbon...
Then a pearl border and some flowers in regular buttercream. I found that no matter how much I chilled the whipped icing, it didn''t hold roses well.
And for a little extra touch, I added some lovebirds! My client loved it!
Awww
This recipe for stabilized whipped icing worked a lot better, but I'm going to continue the search for an even more stable recipe that can hold up roses and other little flowers. Let me know if you readers find anything!

Sunday, January 1, 2012

Spongebob Squarepants Birthday Cake

Hello, all! I just noticed that my blog has just reached 2,701 views. Yay! Thanks, everyone!

For my first cake of the new year, I had a Spongebob-themed quarter sheet for a first birthday. I don't have much experience with the cartoon (I might have seen an episode or two), but I know the two main characters are Spongebob (of course) and his buddy Patrick.

I started with a layer of chocolate and a layer of yellow cake (my client's preference) and filled it with vanilla buttercream.
Then I covered it in a bluish-teal to look ocean-like...
While the buttercream was setting in the refrigerator, I looked up some images of Spongebob  and Patrick and started mixing my colors (and there were a lot of them).

As I usually do with my other hand-drawn designs, I scored the design in with a sharp tool then went over it with the appropriate colors. I heated up some water in a mug and dipped my spatula in it, so I could smooth out the surfaces. And after some time and patience... voila!


I mixed up a bit of "sand," which was some brown sugar and white sugar (a bit more white than brown) so I could fill in the bottom of the scene.
And here's the finished cake! I had to look up some screen shots of the show to figure out the designs in the background, then I added some seaweed and coral on the sides!


The cake was a huge success, and I was excited that it turned out the way it did (I had made several attempts at Spongebob's face before I got it right!)
Related Posts with Thumbnails