Feel free to email any news, videos, recipes, or just about anything to mysweetdiversion(at)hotmail(dot)com!

Friday, September 30, 2011

Celebrating Fall: Pumpkin Crunch Cake

 Fall may have started last week, but I have yet to make a delicious confection with my favorite fall flavor-- pumpkin!-- until now. I decided to make my first pumpkin treat something both gooey and crunchy: a pumpkin crunch cake! My Bestie, Ashley, passed this recipe along to me a while ago. I'm so glad she keeps an eye out for pumpkin recipes for me. :) This recipe is similar to the Pumpkin Gooey Butter Cake I made last year, but this calls for the cake mix to be sprinkled on top of the pumpkin mixture-- along with yummy pecans!
  • 1 box yellow or white cake mix (I used white)
  • 1 -15 oz can pumpkin puree
  • 1- 12 oz can evaporated milk
  • 3 large eggs
  • 1 1/2 c sugar
  • 1 Tbsp pumpkin pie spice (or 1 tsp cinnamon if you don't have pumpkin pie spice)
  • 1/2 tsp salt
  • 1 c chopped pecans ( or kick it up to 1 1/2 if you're feeling nutty heh heh... yea... anyways!)
  • 1c (2 sticks ) butter, melted
1) Heat oven to 350 and grease a 9 x 13 pan.
2) Mix pumpkin, milk, eggs, sugar, spices, and salt.
 3) Pour mixture into the greased pan.
 4) Sprinkle dry cake mix over the pumpkin mixture and top with pecans.


5) Drizzle melted butter over the pecans (Paula would be proud!)
 6) Bake 50-55 minutes.


I allowed this to cool for at least an hour before cutting a piece (the wait was torturous!) I slathered it in whipped cream and snarfed it down! *ahem* I mean, I added a dollop of whipped cream savored every little lady-like forkful. :)
Yum!

Sunday, September 25, 2011

Banana Cupcakes with Peanut Butter Buttercream


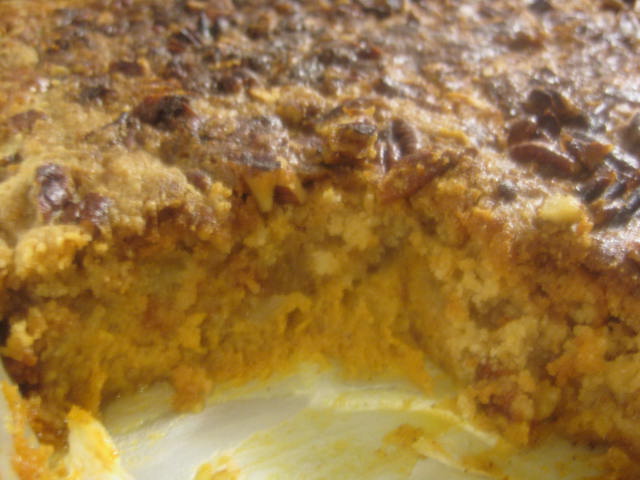
 Hello, all! As you may already know, fall has finally arrived and I am so excited!! Not only is it my favorite season, but it also means everything will be pumpkin-flavored! So there will be many, many pumpkin recipes coming soon!

So I had a banana lying around (OK well, I stole it off of Roger's bunch), and I decided to make just enough cupcakes for that one banana (which is about 9). I found a recipe for banana cupcakes and cut everything in half. This is the whole recipe:

  • 1/2 c shortening
  •  1 1/2 c sugar
  • 2 eggs
  • 1 tsp vanilla
  • 1c mashed bananas (about 2 bananas)
  • 1/4c buttermilk*
  • 2c all purpose flour
  • 1 tsp baking powder
  • 3/4 tsp baking soda
  • 1/2 tsp salt
  • **1/2 tsp cinnamon and 1/4 tsp nutmeg** (I added this and it's delicious!)
1) Cream shortening and sugar.

2) Add eggs, vanilla, bananas, and buttermilk.
3) Combine the flour, baking powder, baking soda, salt, cinnamon, and nutmeg. Add to the banana mixture.
4) Bake at 350 for 15-20 minutes. Insert a butter knife in order to determine doneness.
They look a bit overfilled, so I'll make 9 next time
Meanwhile, I made a Martha Stewart recipe for peanut butter buttercream (yields one cup-- perfect for this amount of cupcakes!)
  • 2/3 c peanut butter
  • 8 Tbsp (1 stick) unsalted butter, softened
  • 3/4 c confectioner's sugar
  • fine salt (like popcorn salt)
1) Cream peanut butter and butter on high speed using the paddle attachment.
2) On low speed, mix in the sugar until combined, then beat the mixture on high until fluffy (about 3 minutes).
3) Add salt to taste.
Yum!!
  And when the cupcakes and this buttercream are combined...
... something delicious and magical happens! These are amazing! My Betrothed (who is a huge fan of bananas and peanut butter) loved them! So these recipes are definite keepers! I can't wait to pair these banana cupcakes with other buttercream recipes (cream cheese? salted caramel? Brown butter?). Stay tuned!

Ah, yes. About that pesky asterisk up there...

*I didn't have buttermilk on hand when I was making this recipe, but I did have milk and lemons, so this is a way to make buttermilk for baking: Combine 1/2 cup of milk (I had 2% and it worked fine) and 1 tablespoon of fresh lemon juice. Let sit for 15 minutes, and voila! You have buttermilk!

Sunday, September 11, 2011

Cupcakes for Two! (Or one)

My ultimate goal in life is to run my own bakery. To start, I need to come up with intriguing flavor combinations, and I have pages full of ideas! But I don't want to make a huge batch of cupcakes, so I looked up some small-batch baking recipes and found this recipe for just two cupcakes.
  • 1 egg white (** I sued about 1/2 to 3/4 because I had large eggs**)
  • 2 Tbsp melted butter
  • 1/4 c flour
  • pinch of salt
  • 1 1/2 Tbsp milk
  • 2 Tbsp sugar
  • 1 tsp (yes, one whole teaspoon!) vanilla extract
  • 1/4 heaping tsp baking powder
1) Preheat oven to 350 and place two cupcake liners in the center two cups of a cupcake pan.
2) In a bowl, whisk the egg white and sugar together, until combined.
3) Add vanilla and melted butter and mix well.
4) Add flour, baking powder, and salt. Stir until smooth.
5) Stir in milk then bake for 15-20 minutes (or until a butter knife inserted comes out clean)

I attempted this recipe twice because the first time, my cupcakes came out rubbery and egg-y. Ew. The next time, I did not use all of the egg white. (This is probably due to my use of large-size eggs). I also made sure my baking powder was seriously heaping!
Yaaay! So round and awesome!


Decorate any way you wish!
 This recipe is a perfect idea if you want just enough cupcake to share with someone else or to eat all alone with little guilt! In my case, I would usually eat both. However, Roger (my Beloved) is quite fortunate this evening, for he will be coming home from work to see this:
I felt generous today. :)

Sunday, September 4, 2011

A Bit of a Facelift...

As the first birthday of My Sweet Diversion approaches, I figured it was time for a bit of a makeover. I have been in love with this particular shade of purple for a while, and I wanted to incorporate it into my blog. Plus, it's easier on the eyes! :)

Monday, August 22, 2011

Made with Love


 In recent news, my Beloved has now become my Betrothed! :) I'm very excited and I wanted to celebrate the occasion with a special little cake. One of his favorite things to eat is sour cream (he could probably eat a whole tub in five seconds flat), so I found Paula Deen's Almond Sour Cream Pound Cake. I cut the recipe in half because I wanted to make a small cake:

  • 1/4 pound (1 stick) butter
  • 1 1/2 cups sugar
  • 1/2 cup sour cream
  • 1 1/2 cups all purpose flour
  • 1/4 tsp baking soda
  • 3 eggs
  • 1/4 tsp orange extract ( I used vanilla)
  • 1/4 tsp almond extract
1) Preheat oven to 350. Then grease two 6-inch round pans
2) Cream butter and sugar together then add sour cream.
3) Sift flour and baking soda together. Add to creamed mixture, alternately with the eggs, one at a time.
4) Add extracts and stir to combine.
5) Pour into pans and bake for 45 to 50 minutes.

Cool the cakes in the pans for 10 minutes then turn them out into cooling racks.

"But wait!" you might interject, "why is there a square cake up there?" Well, during the turning-out step, I lost some cake, so I had to ice between the layers and cut them down (the cake waste was still tasty!) It's all good-- no shame in it. Hmph.

So after the sides were cut down, I iced the cake, smoothed it a bit, then chilled it in the freezer to set the buttercream. Then I used a handy-dandy Wilton spatula to get really straight edges.

The hardened icing made it really easy to shave down any bumpy parts.
ooooh ahhhh
I wanted to keep things simple, so I used some black icing to make a little swirl pattern and a snail trail border. And voila!

My betrothed loved it! The cake was quite moist and I loved how it paired with my Butter-Almond buttercream. Yum!

Friday, August 12, 2011

Double Birthday Cakes!

This past week, my very very good friends came into town. Their birthdays are really close to each other, so of course I wanted to make them cakes! For Joe, who's birthday was at the end of July, I made a Futurama cake. More specifically, a Bender cake.

Cutting out those letters in Futurama font was no small task, but it was worth it to see Joe's reaction. And I must say, my Beloved did most of the Bender! I was focusing so much on the letters, I told him to do his best Bender-- and he did an excellent job! In case you can't tell, I covered the cake in dark blue, light blue, and black fondant marbled together. To mimic space, I dotted it with some stars. And the cake inside? Classic yellow cake with chocolate buttercream. Yum!

The other cake I made was for his wife (and my bestie!) Ashley, whose birthday was this past Monday. I had so many awesome ideas for her, but I decided on an Alice in Wonderland cake.


This is a white cake with raspberry filling and vanilla buttercream. For the outside, I smoothed two different purple tones so they can blend into each other. I added some fondant accents like the Cheshire cat (can't forget him!), the Mad Hatter's hat, some playing cards, and some mushrooms (those are on the other side of the cake). I was so excited! However, I made a faux pas, since the unbirthday is actually the other 364 days that aren't your birthday, and I made this cake on the one day that was. She loved it anyways, though! :)

I must thank Joe and Ashley for taking pictures of my cakes! I was running around so much, I didn't get a chance to snag some progress shots or finished shots of my own!

Tuesday, July 26, 2011

Sushi Boat Cake


Hello, again! I am so excited to say that I am going on a mini vacation with my beloved, and it starts tomorrow afternoon! And I'm glad that I was able to finish my entry into another cake contest as well. This one was The Great Cake Contest sponsored by Disney Family Fun. I chose the "faux food" category and made a sushi boat cake! I started with yellow cake baked in a 13 x9 pan then cut it lengthwise and stacked the halves on top of each other. Then I carved the cake into a boat shape.
I carved out the middle then crumb-coated it...
Then covered in fondant...
Then I scored "boards" on the outside and inside of the boat and scratched wood-grain into it.


I mixed up some brown dye and some yellow dye into vanilla flavor (vodka works too!) and brushed it on.
It looks like wood now!
Then came the fun part-- the sushi! I mixed up some colored fondant that matched raw tuna and salmon. I also mixed up some orange and greens (carrots, cucumbers, wasabi) and made little fondant sushi rolls the way I would make regular sushi. For my "veggie roll," I rolled out logs of light green and orange. Then I bundled them together and rolled a thick layer of white over them (the "rice"). Then I rolled a thin layer of black over the whole roll (my "dried seaweed"). I cut the ends off then cut little slices with my X-acto knife. The little sashimi were easier, and I even dipped some rolls into orange nonpareil sprinkles (the "salmon "roe). Here are some details of the rolls...
A little pink petal dust for the yellowtail sashimi
I textured the outsides with crumpled foil!
My little hand rolls at the front of the boat :)
And, of course, I can't forget the pickled ginger and wasabi!

My finishing touches were a fortune cookie, chopsticks, and a little bowl of "soy sauce" (piping gel dyed brown and thinned out with a little water).
And here it is all put together. :)
I must say, I am very happy with how it came out! I won't find out the results of the contest until the end of next month-- fingers crossed til then!

And if you have any further questions about any of the rolls I made or techniques I used, feel free to comment or email! [mysweetdiversion@hotmail.com]
Related Posts with Thumbnails